Physical Address
304 North Cardinal St.
Dorchester Center, MA 02124
Physical Address
304 North Cardinal St.
Dorchester Center, MA 02124


OpenClaw is an open-source AI agent platform for building assistants that can use tools, connect to apps like Slack, and run structured workflows.
This beginner setup guide walks you through how to install OpenClaw, what you need before you start, and how to get your first assistant running.
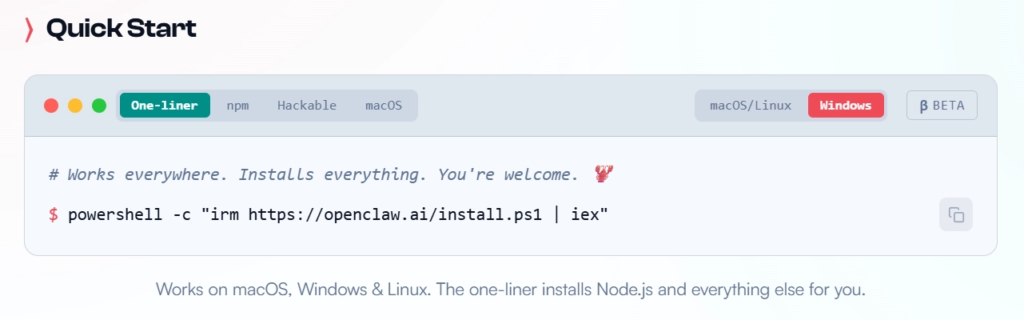
OpenClaw is an open-source AI agent platform that lets you build and run personal AI assistants connected to tools like Slack, with web search and custom skills built in. Before you start the OpenClaw setup, you’ll need a Claude subscription (Pro or higher) and a Slack workspace.
Time to complete: ~20 minutes · Skill level: Beginner
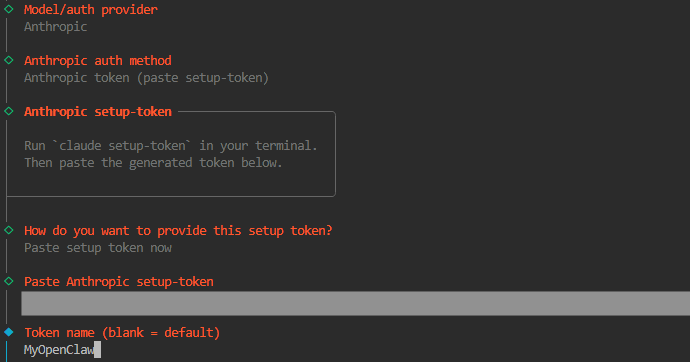
For this option, ensure that you already have a Claude subscription!
Generating the ClaudeCode setup token
To get the setup token, in a separate terminal, run
claude setup-tokenIt will then open the browser with a code you can copy and paste. Copy that code and paste it to the same terminal and press enter. Then it will show the session code (starting with sk-ant-oat01-…) in yellow.
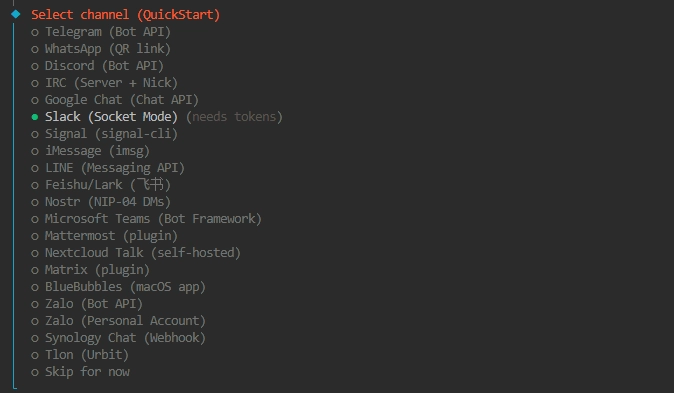
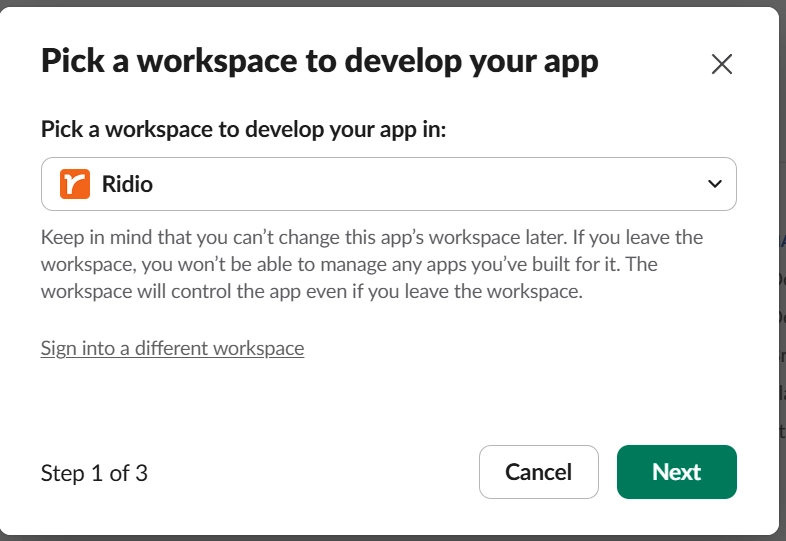
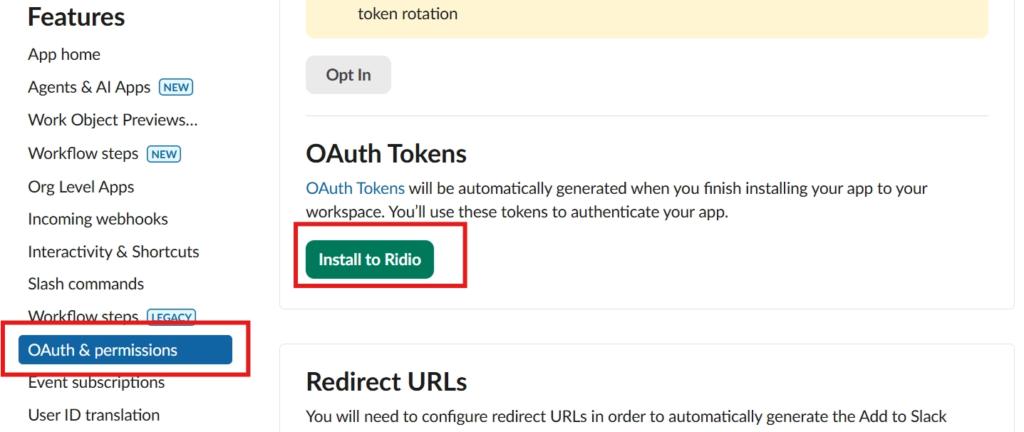
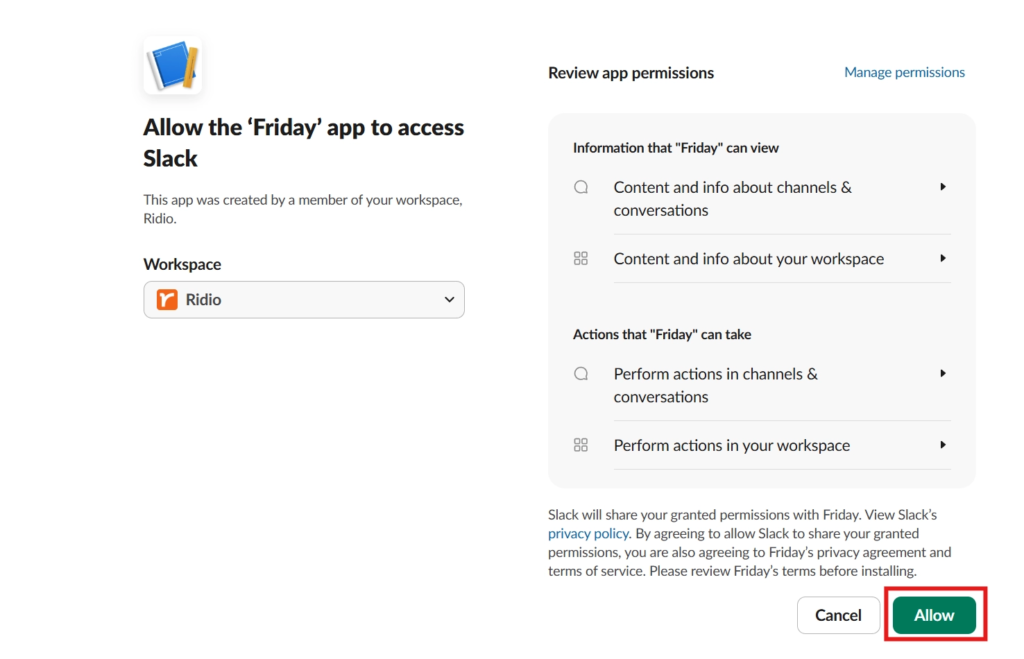
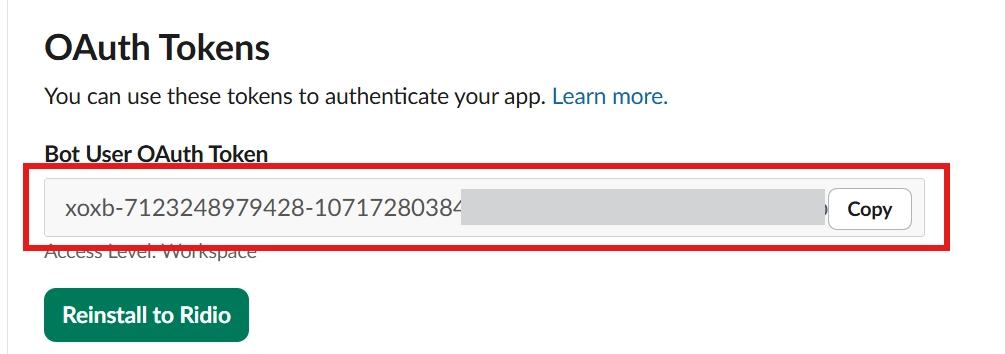
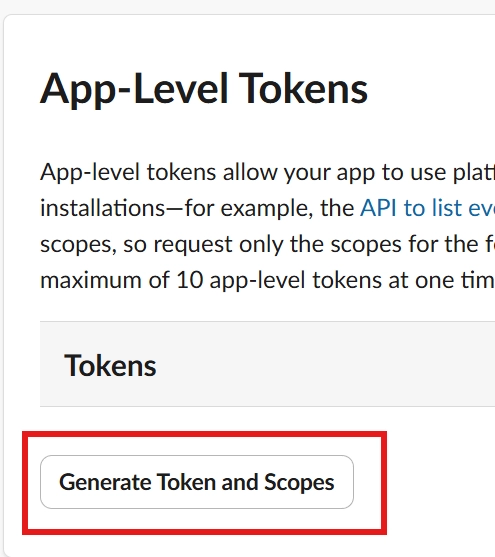
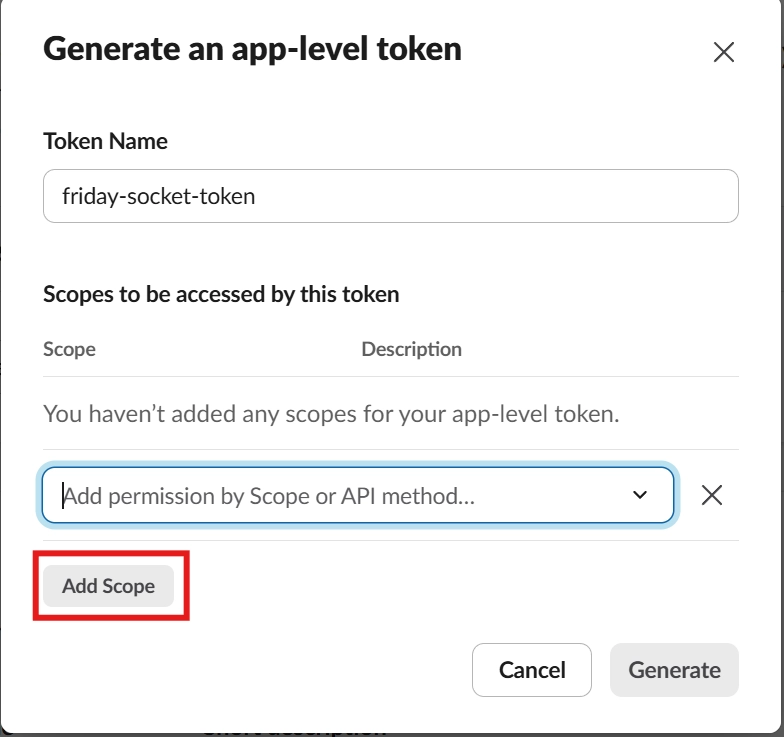
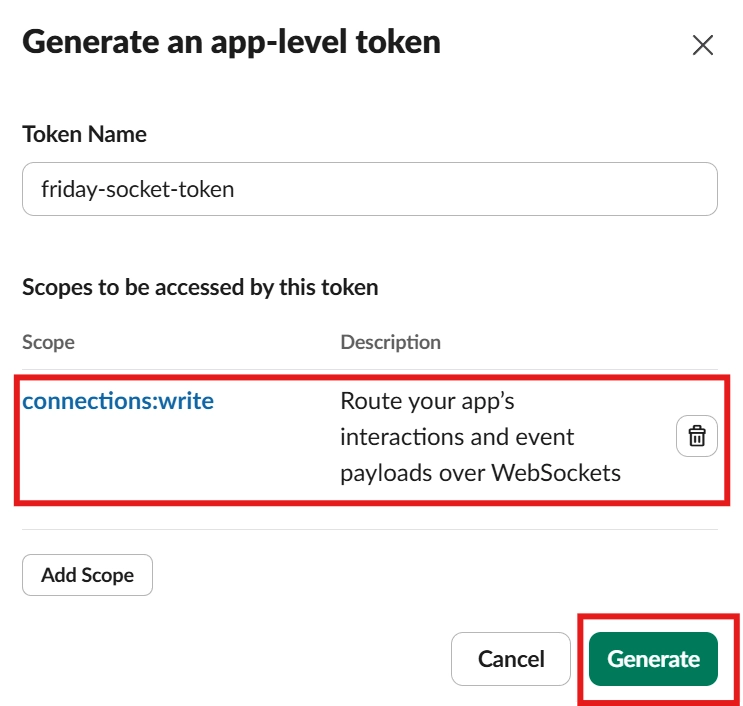
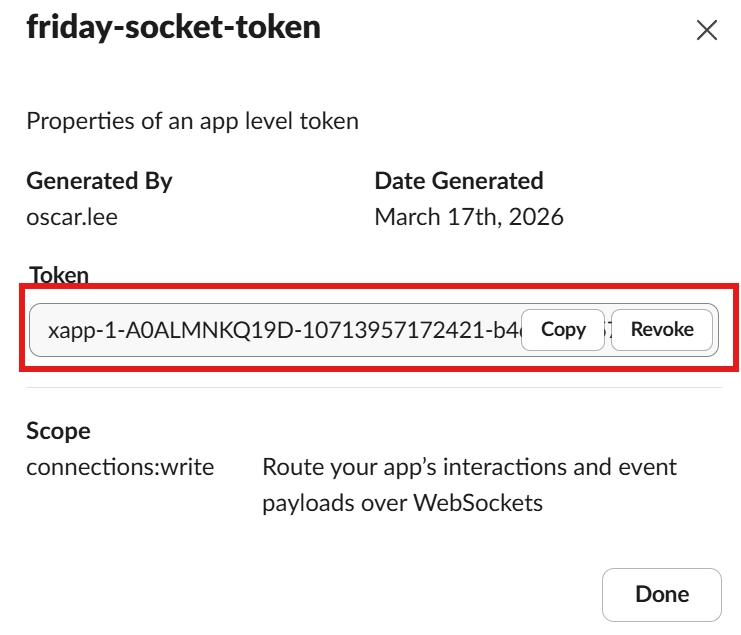
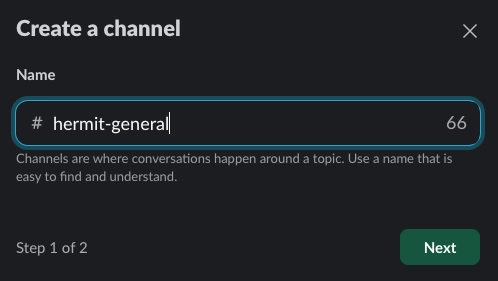
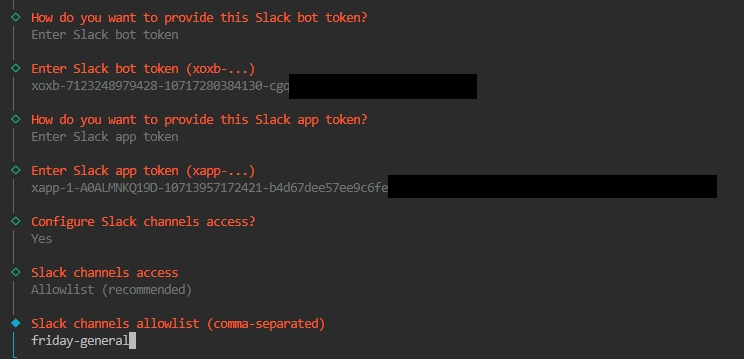
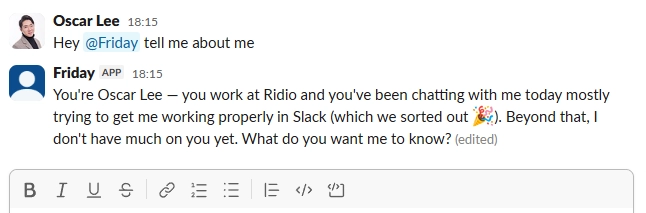
The next phase of the OpenClaw setup is connecting your communication channel. Select Slack and give your bot a name (e.g. “Friday”). You’ll need to generate two tokens from the Slack API dashboard: a bot token and an app token. Create a dedicated Slack channel, add your bot to it, and paste the channel ID (not the name) into the OpenClaw setup wizard.

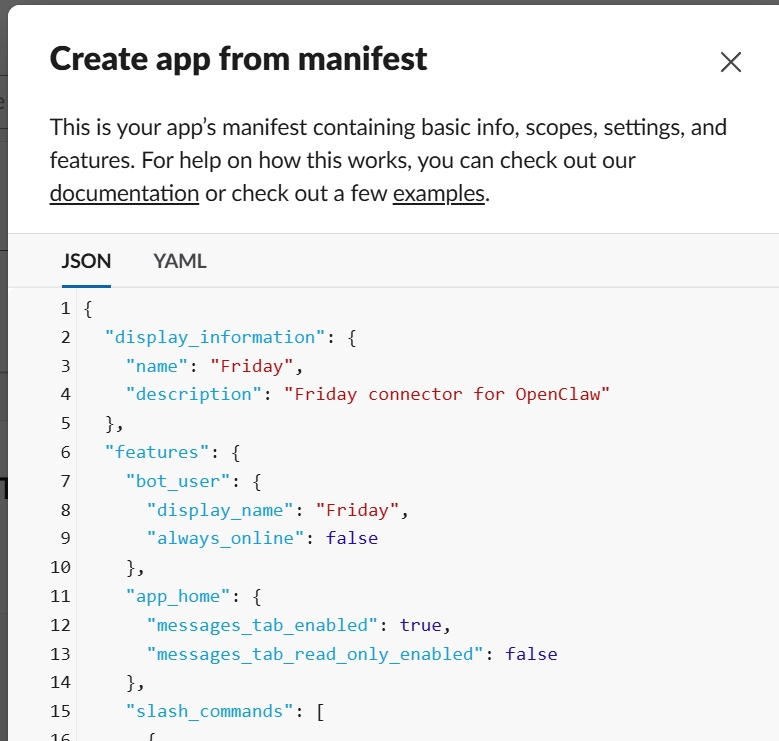
💡 We will be following instructions from https://docs.slack.dev/app-management/quickstart-app-settings

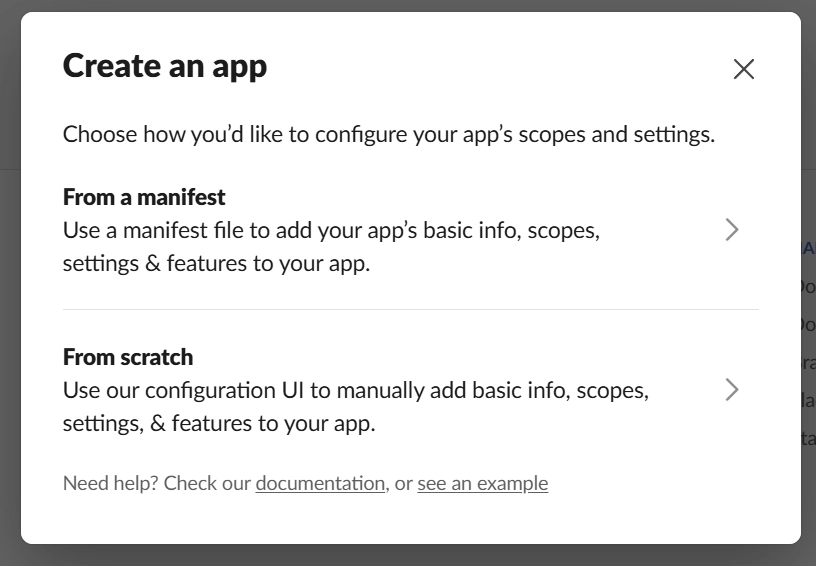
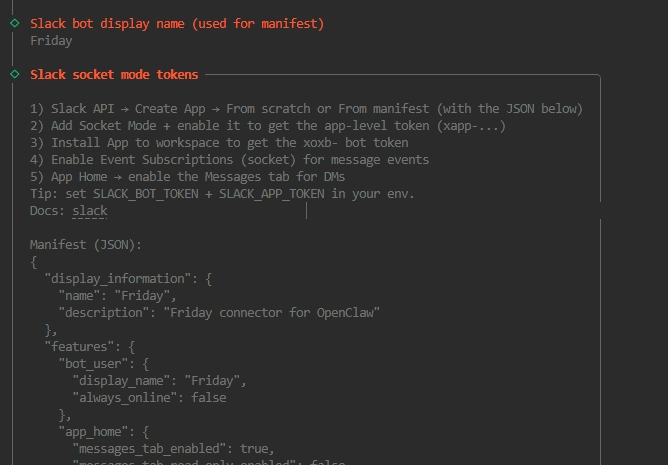
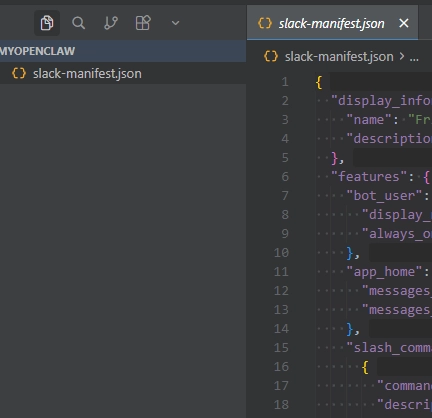
Please clean this json code and save it as slack-manifest.json.
{YOUR COPIED MANIFEST”}

We can also configure a search provider for our OpenClaw agent to have web-surfing capabilities. Some options are provided by default, but we can always change it later. For now, we will go with the Brave Search option and get started with $5 per month plan.
Feel free to experiment and do your own research on different search providers. I also think that Tavily search (https://www.tavily.com/ ) is a great contender as well.

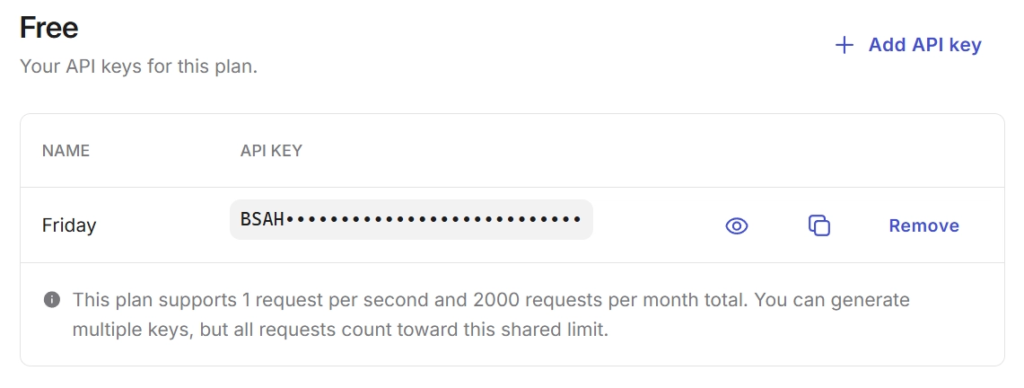
Get Brave search API key from https://brave.com/search/api/ and paste it here.
If you don’t have an account already, create an account at https://brave.com/
On the dashboard sidebar, navigate to “API keys” and click on “Add API key” option.
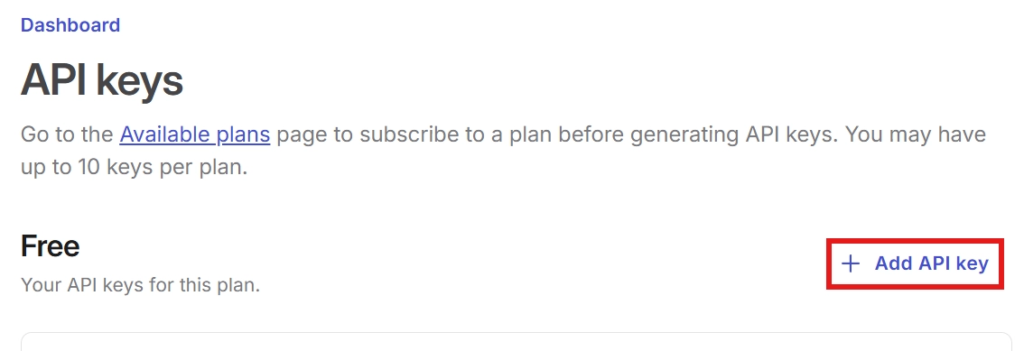
Once added, you will now have a new key you can copy and paste to OpenClaw.
As we have covered in our Claude Code skills series, Skills provide the agent with pre-configured abilities that let’s them do very particular things. To effectively use OpenClaw (or any other agents), skills are a must!
OpenClaw comes with a few skills that it can be configured out of the box.
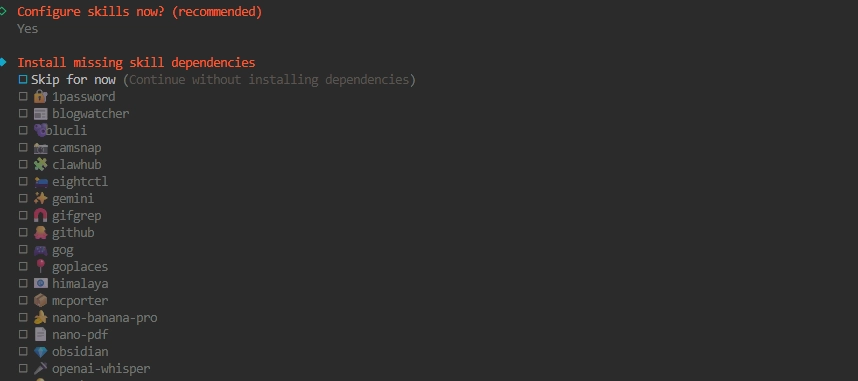
You can press space to select a skill to install. For simplicity, I’ve selected all skills. When you hit enter, it will then ask you how you’d like to install the skills. I personally like to use pnpm but it does not matter which one you choose too much.

It will prompt you for API keys where necessary. For those, please enter your relevant API keys.
For more available skills for OpenClaw, you can visit:
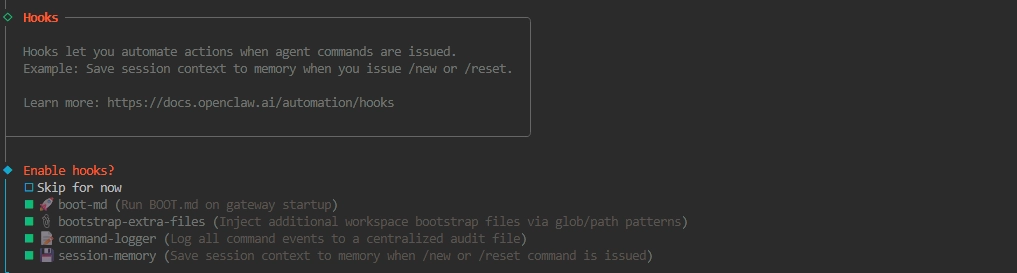
The next section is about adding hooks. Hooks are built in “code” that allows the agent to automate a piece of work at particular situations. You can imagine it as like “reading a book” before going to bed or “taking a dog for a walk when waking up”.
OpenClaw provides a few options by default. Enable all of them by toggling with the spacebar and hit enter.
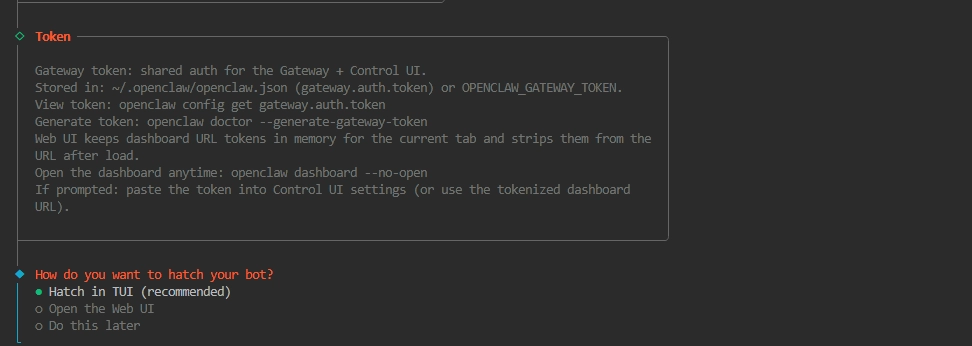
Now we’re at the final piece. It will then ask you to hatch your bot. We will go with the first option, TUI (Terminal UI) as that is the recommended solution.
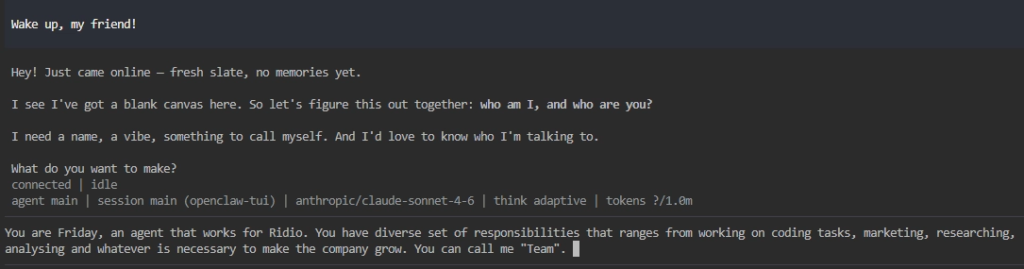
This is just a simple process to let OpenClaw understand who you are and just giving a little more information about yourself. You can talk to it just like how you’d talk to Claude or ChatGPT.
Now we are ready (almost)
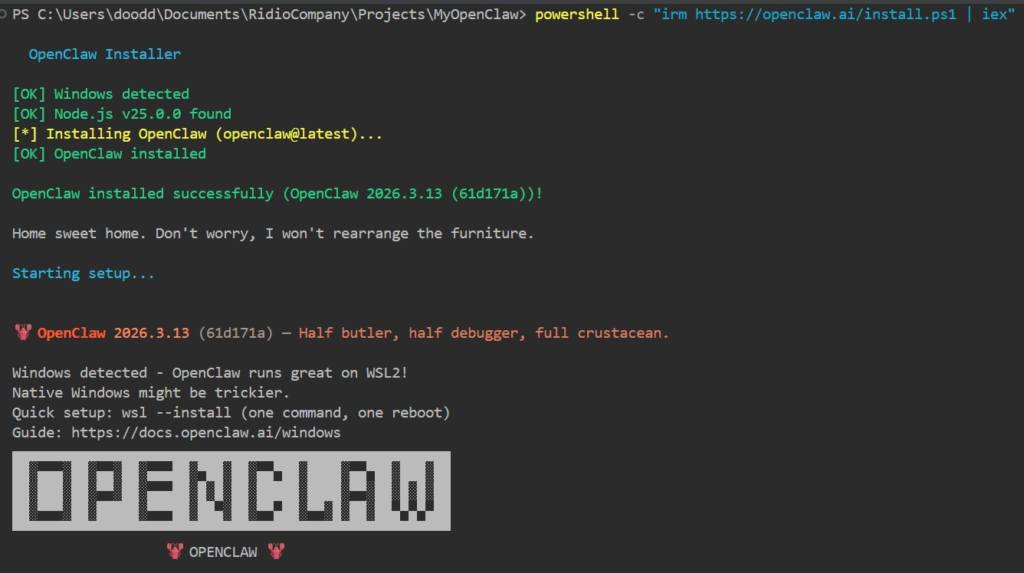
To get started with OpenClaw, ensure that your gateway is running!
Run: OpenClaw Gateway
Once we have successfully onboarded OpenClaw, we can view all its configurations, make chat, and settings from the dashboard. Simply run the following command in the terminal:
openclaw dashboard

Then it will open a new tab for the OpenClaw dashboard.
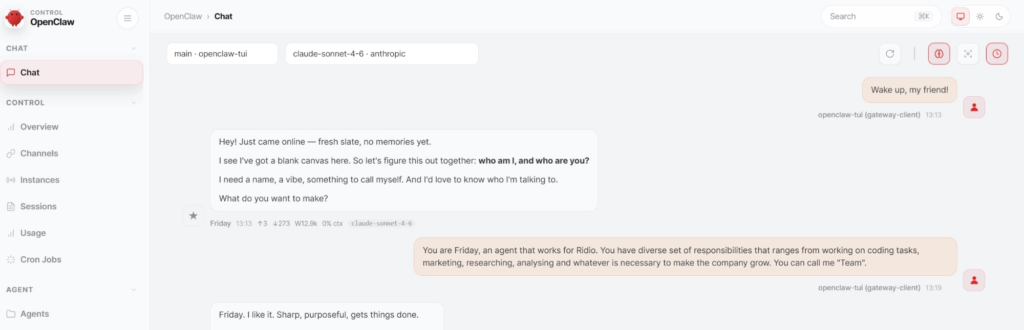
This is the control UI. You can now start to control everything here.
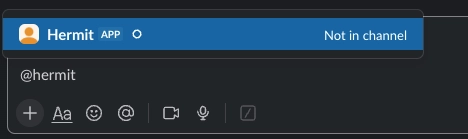
When I send a new message to Friday, it gives the response well! Now we’re good to go.
sk-ant-oat01-... string with no trailing spaces.Okay so now we’ve installed OpenClaw and we got the basics set up. Well done. Now we just need to figure out what we are actually going to use this for. Tune up for the series and we will be showcasing how we use OpenClaw at Ridio so you can use it in a similar way as well.
👉 How to create a PPT presentation with Claude
👉 Claude Code Tutorial for Beginners – Setup Guide
If you've been trying to decide between Claude Code vs Codex, you've probably run into the same wall…
GPT-5.6 solves a 50-year math problem. An AI agent raises $100 million. And Congress wants to know who…
Ownership, regulation, drug discovery, infrastructure. Four stories that prove AI is no longer just a technology question. By Woosub…